
Looking for virtual classroom software? You’ve come to the right place. In this article we’ll take you through step-by-step how you can get set-up with Zoom and Arlo, the ultimate software stack for delivering virtual training.
Contrary to what you might think, to run good virtual training you don’t need a whole bunch of production gear. We’ve written an article on technical tips for hosting a webinar, with some good intel on what gear you will need.
But what you will need is good, robust and secure virtual classroom software to help you manage and deliver that training. Arlo and Zoom is all the software you need.
Together, Arlo and Zoom make a great remote training solution. While Arlo is a training management system that handles your online bookings and payments, manages courses, venues and presenters, provides reporting, tracks finances and invoicing, manages client records and more! Zoom is the world's leading webinar software, enabling you to deliver live online training to global audiences via webinar.
Pair them together with the Zoom integration and you have a complete, automated solution for running webinars, with information flowing seamlessly between both platforms. The native integration allows you to have more control over scheduling Zoom rooms, managing online events with multiple sessions and more - giving you an even more elegant solution to running your webinars.
To find out more about how Arlo and Zoom makes the ultimate virtual training software stack for your training business, check out the Ultimate Guide to Virtual Training, or get in touch with our sales team.
Or, read on to find out exactly how to use Arlo and Zoom together.
Virtual classroom software: How to use Arlo and Zoom
What software plans do I need?
In terms of subscriptions for Arlo and Zoom we suggest the following:
- With Arlo you can use the Zoom integration on any of our subscription plans. Check out our pricing.
- For Zoom we recommend the “Zoom Pro” license plan or above.
We also suggest that each of your presenters have their own Zoom account. Not only does this comply with the terms and conditions of Zoom, it also allows you to use Arlo’s Presenter Scheduler to see when each Zoom room is in use. This will help you to avoid conflicting webinars.
First things first...
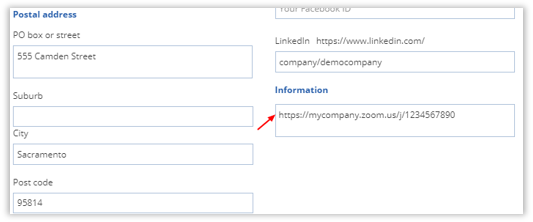
There’s a couple steps you need to take before you can start delivering your virtual training. For each of your Zoom Hosts, you need to access their personal meeting URL and add it to their presenter record in Arlo. By doing this it is much easier to add the correct Zoom Meeting URL to any webinar you create.
Just find the presenter’s record in Arlo. Then in the “Information” field paste the Zoom Meeting URL.
1. Now what? Create your your webinar
It’s easy to create a webinar within Arlo. From the Webinar page, select “New webinar” and Arlo will then guide you through the setup process.
Now, the really smart thing Arlo does, is allow you to use templates to save time when creating courses and webinars. Templates contain all the basic information about a course or event that is likely to be repeated whenever a course is run multiple times. For example, price, course duration, course description and other information. By selecting a template at the start of creating a webinar you won’t need to enter this information.
Even better, is that you can use a template from the webinars face-to-face counterpart. So if you’re trying to move your face-to-face courses online, you can take advantage of templates. Just select the original template for the face-to-face course and all those details will be passed over.
During the creation of your webinar you will set things like:
- General settings - price or whether there are CPD points available
- Website settings - what is the advertised duration of your webinar, a brief description, and the ability to upload an image.
- Schedule - In this section you will do things like set the start and finish times, and book presenters. Additionally, here is where you will add the Zoom Meeting URL. We will go into more depth about this in a moment.
- Registrations - Here you can set registration limits, maximum numbers and minimum numbers.
- Survey - If you are using SurveyMonkey you can have surveys sent out once the course is complete.
- Communication - Here you can choose what email communication you would like Arlo to to send out automatically to your registrants.
Finding and adding your Zoom URL
If you have added Zoom Meeting URL’s to your presenters this step is easy. But don’t worry if you haven’t.
We will be adding the Zoom Meeting URL into the “Guest URL” field in the Schedule tab. Simply go to the presenter you have selected for the webinar. Open up their record copy the Zoom Meeting Room URL from the left hand information.

Then paste it into the Guest URL field.
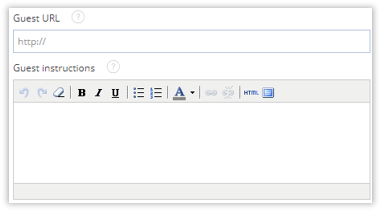
If you haven’t added the Zoom Meeting Room URL to your presenters, just grab it from Zoom and paste it in the Guest URL field.
After creating your webinar, you will be able to see it live on your website. Start promoting your virtual training and watch those registrations flow in!
2. Transfer any face-to-face registrants
If you are moving your face-to-face courses to webinars, it’s likely that you will need to transfer your registrants to the new webinar.

Go into the old face-to-face course in Arlo. Find and open the registration you need to transfer.
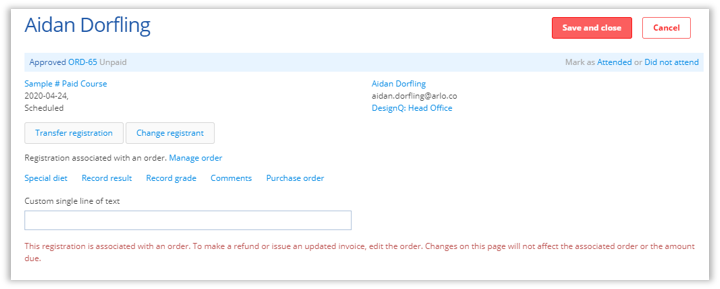
Then select “Transfer registration”. Find the right webinar, then select “Transfer registrant”.
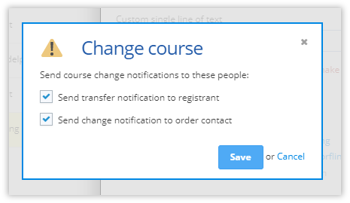
You will then get to choose what change notifications you want to be sent.
Pro-tip: If your webinar used the same template, it makes it a lot easier to find the webinar, rather than search through a full list of all courses and events you run.
4. Record your webinar
Before you start your webinar we recommend recording it. Most virtual classroom software or webinar platforms will easily allow you to do this. Zoom will give you the option of storing your recording on the cloud or on your local hard drive.
Once you have a recording of your webinar you can easily host that content either on Zoom, YouTube, your website, or somewhere else and sell the recording as an on-demand video.
Arlo allows you to create on-demand elearning content to be sold on your website. What are the benefits of this:
- Your training business gets another revenue stream
- You get more return from your original webinar, it goes from being a one-off to a resource that could generate some passive income
- Your registrants get another way to consume your content
There you have it! The best virtual classroom software for training providers.
If you’re already an Arlo customer and want a super specific guide with all the information check out our support center guide.
.png)
.png)
.png)
%20(1).png)