Recently updated on June 2nd, 2022
Imagine if you could add 10% more sales on your courses, by simply using what you already have – visitors to your website. Getting visitors to your website takes a lot of time, effort and budget – and most won’t end up making a purchase. In fact, Smartinsights show that the average e-commerce conversion rate is between 2.8% and 4.5%.
There are many automations that you can use to increase customer engagement, recover lost customers, cross and upsell, and nurture relationships to convert visitors into paying customers.
The objective is to revive an abandoned cart to bring potential customers who have expressed an interest, but have not quite committed, back to complete a transaction. Bringing them back and converting just 10% of those carts can increase your income by up to 30%.
In this article we dive into an ‘abandoned cart’ strategy to drive revenue growth. Did you know that the average online shopping cart abandonment rate is 74%? That means someone has placed your service in their cart and haven’t quite made it to checkout. Let’s see how we might entice them back.
For this we are using Mailchimp, although abandoned cart strategy can be implemented using many platforms and integrations, and you can apply the principles wherever you may choose. If you haven’t yet done so, find out how to connect Arlo and Mailchimp.
How to create an abandoned cart workflow in Mailchimp
Step 1: from Mailchimp’s dashboard, navigate to Automations.
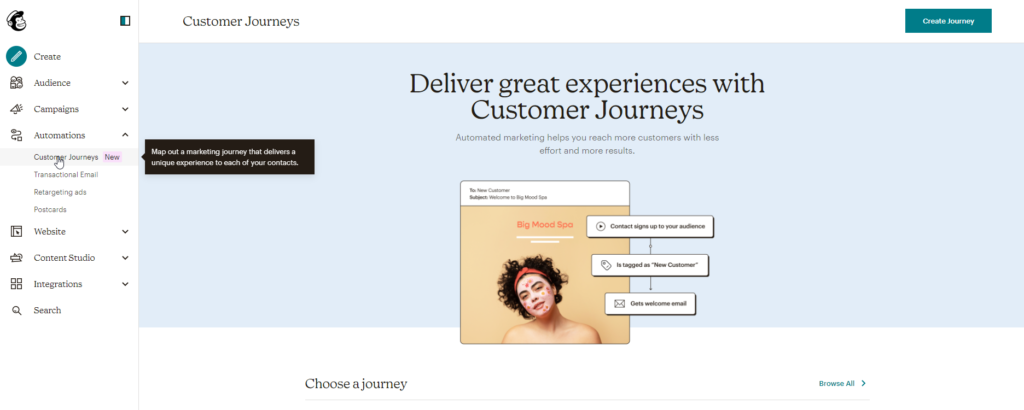
Step 2: click on Customer Journeys where you will see a number of prebuilt options from which you can choose, such as:
- Recover lost customers
- Welcoming new contacts
- Promote cross-sell opportunities
- Remind customers to reorder …and more!
You can also build your own journeys from scratch, however for this tutorial we are simply going to use a pre-built journey for an abandoned cart strategy.
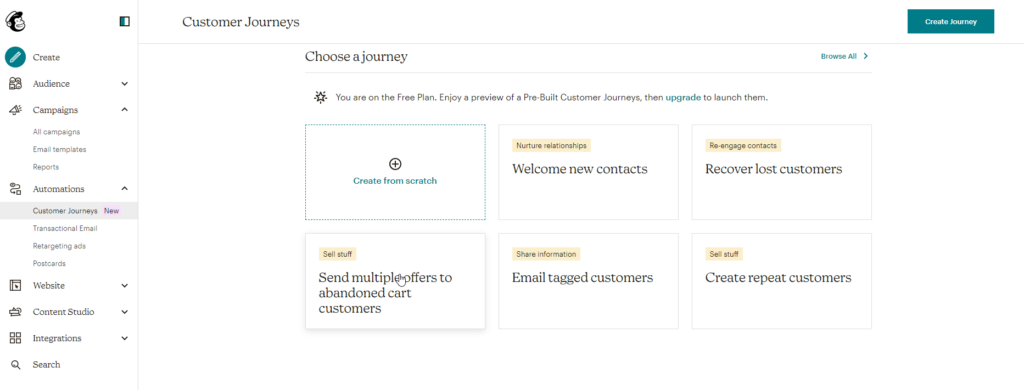
Step 3: Build a journey
- Click on “Build a Journey”
- Then select your Audience from the drop-down menu
- Once you’ve selected your audience, click ‘Continue’.
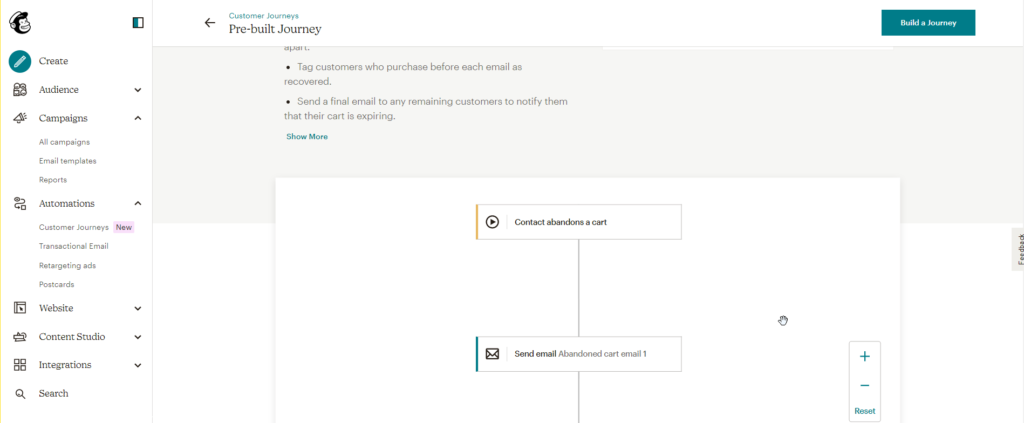
You will see the current automated email sequence.
It’s important to know that if you upgraded to the Essentials plan, you can only access four points in your customer journey.
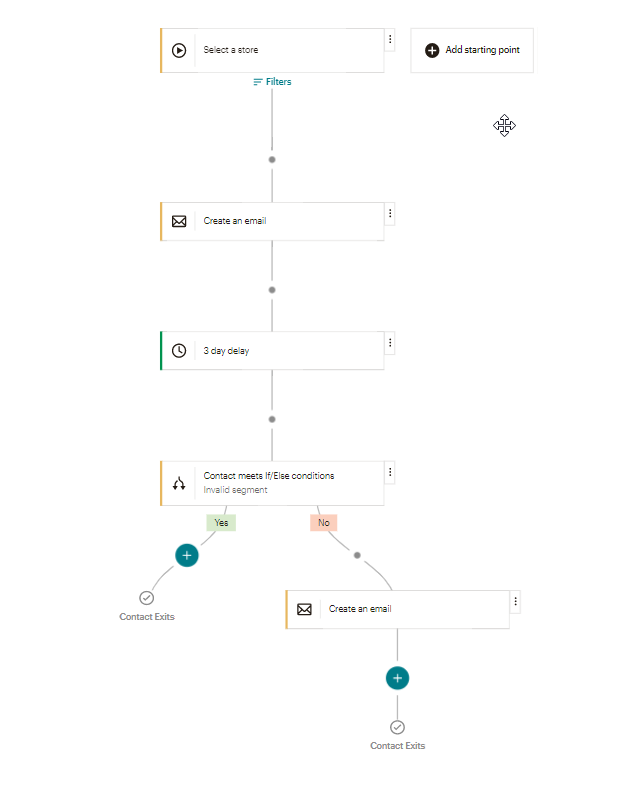
You can click on an action, such as Create an email and this will bring up a new dialogue box.
Step 4: Create email
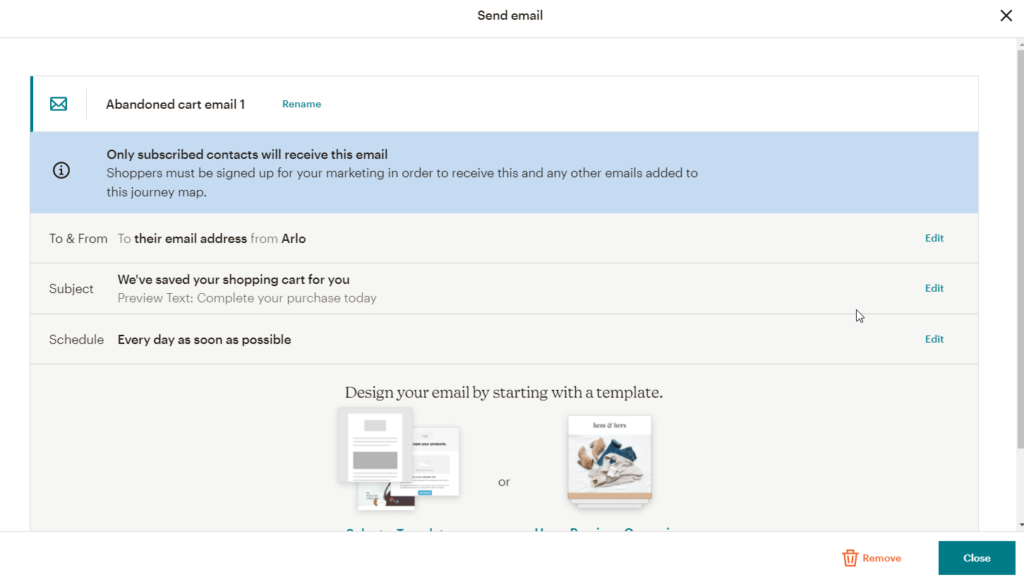
From here you can set To and From, the Subject and the Schedule. The schedule says that it will send emails to qualifying customers as soon as the trigger is ready. The trigger is someone abandoning a cart. The message says “we have saved your cart, come back to complete the purchase”.
You can design your email, amend the text, headers and colours to align with your Brand CI, Messaging and Tone.
Step 5: Time Delay
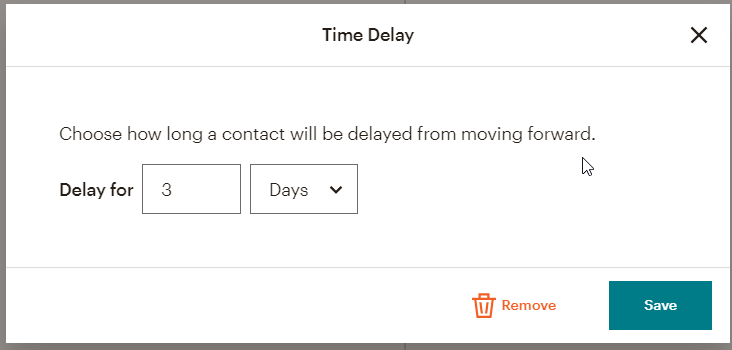
Next you can set how long you would like the automation to wait before it does the next step. This gives your customer time to complete and also allows you to not push too hard. You might want to wait an hour, 6 hours, 3 days, or several weeks to trigger the next event. Think about the customer and their intent, as well as the lifecycle of the basket.
Step 6: If/else settings
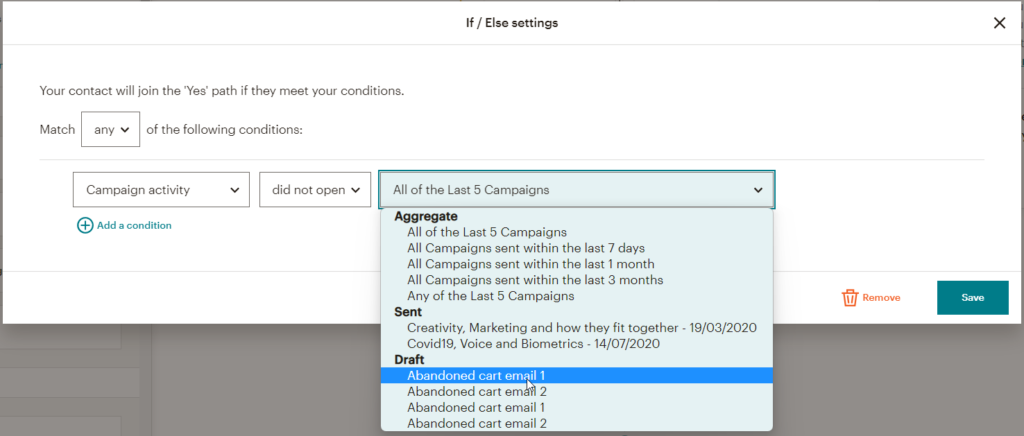
Using if/else you can decide what, if any, action will trigger next for a customer in the abandoned cart funnel. This says that we will trigger ‘yes’ and will send another email if they did not open the previous abandoned cart email.
You can select many conditions to ensure that your emails reach the right customer with the right messaging. If you send out weekly marketing emails it might make sense to send them first and then only trigger abandoned cart emails only to people who meet the following criteria:
- Signed up for news
- Opened the last newsletter
- Did not open the first abandoned cart email
This qualifies the lead by saying that they are probably interested as they have signed up, however there is something stopping them from completion. At this stage you might want to offer them a discount or other incentive to close the sale.
Discounting and having coupons may be enticing, just be sure to try and get them back at full price before you send a discounted offer into cyberspace.
Step 7: create more emails.
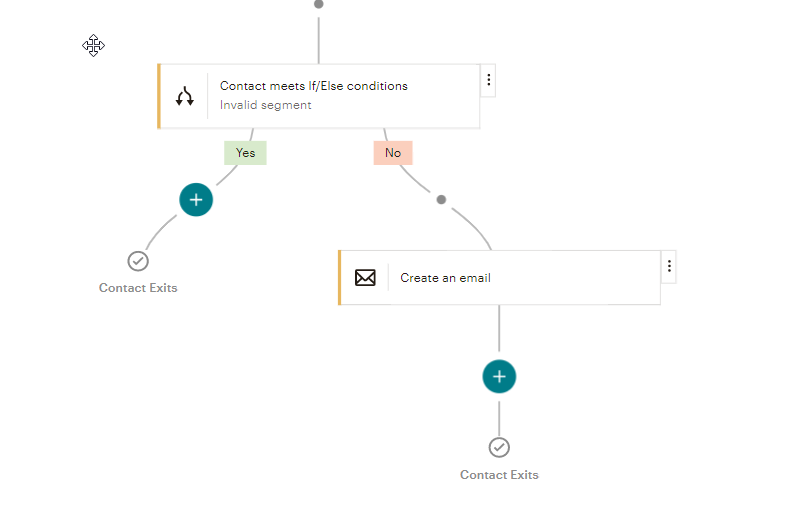
You can create another email, set more conditions and continue this journey until you get a sale or a condition disqualifies your customer. This might be unsubscribing to your newsletter.
Give it a try!
Connect Arlo to Mailchimp to get this solution working. Note that you will need one of Mailchimp’s paid subscriptions to replicate this workflow.